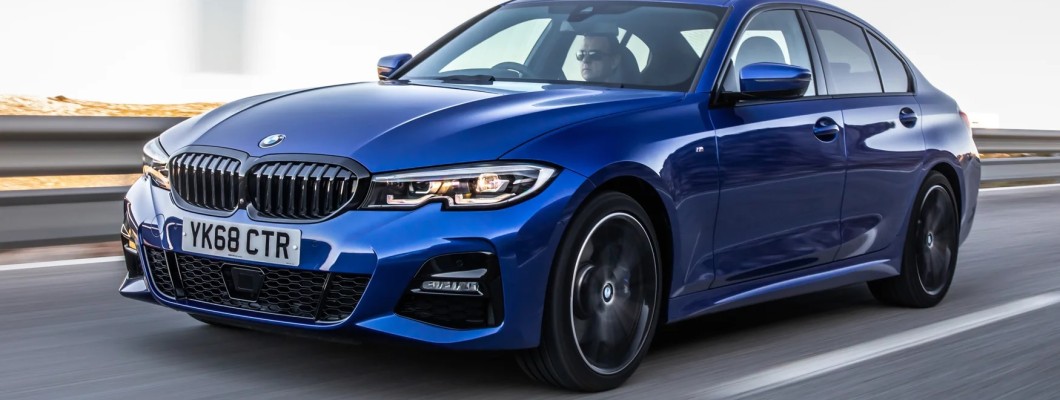
BMW Genuine M Performance Front Bumper Retro Fit
If you have an SE BMW and you love the sharper look of the M Sport front bumper, the practical question is simple. Will it fit?
In most cases, the answer is yes. The physical mounting points on the chassis are shared between trims, so the bumper shell will bolt up.
The part that catches people out is everything around it. The M Sport cover expects different air ducts, grilles, fog surrounds, and often a different lower tray. Fit the right supporting pieces and it all lines up cleanly. Skip them, and you’ll be chasing odd gaps and flapping plastics.
The Quick Verdict
- The bumper shell attaches to the same factory mounts as SE on the same model and generation.
- The shape is different, so you usually need M Sport-specific grilles, ducts, brackets, and trims.
- Sensor and lighting layouts can differ, which means extra holders, gaskets, or wiring changes.
- If you plan and order the supporting parts, the swap is straightforward for a competent body shop.
Why BMW Made It Possible
BMW designs body-in-white hard points to be common across trims.
Fender edge bolts, upper lock-carrier screws, and the lower undertray fasteners are consistent. That lets the factory build SE, Sport, and M Sport from the same shell and crash structure.
It also means owners can upgrade later without drilling new holes or welding brackets. When people say the M Sport bumper “fits,” they mean those primary anchor points are identical.
Even so, facelifts matter. Pre-LCI and LCI can have different guide rails or stabilisers. The bumper still attaches in the usual places, but you might need the later style guides to keep everything snug.
Treat LCI status as a key part of your shopping list.
Where the Differences Start
The obvious changes are visible. Larger lower intakes, sharper corner inlets, sculpted side pieces, and a sportier lower edge. Less obvious are the supporting plastics that make the airflow work.
Expect at least some of the following to change when you fit a BMW front bumper or M Sport front bumper:
- Centre lower grille and side grille trims
- Fog light housings, or blanking panels if your bumper deletes fogs
- Brake cooling ducts and air channel tubes
- Lower undertray or an adapter panel that links bumper to engine splash guard
- Wheel arch liner extensions or sealing strips
- PDC sensor holders and rubber grommets
- Radar bracket for ACC where fitted
- Headlight washer jets, caps, and sometimes the hose layout
- Towing eye cover unique to the bumper skin
- Foam impact absorber, occasionally a different profile
- Small support brackets or clamping strips along the lower edge
One or two items may be reusable. Many are not.
Real gains come from gathering every M-specific plastic shown in the official parts diagram for your VIN and bumper option code.
Patterns by Model Series
The overall pattern repeats from E to F to G chassis. Mounts are the same, the skin is different, and a handful of supporting parts, including the BMW front bumper, complete the picture.
BMW series and years | Does it bolt on to SE mounts? | Typical extra parts you’ll need | Notes that save time |
|---|---|---|---|
E90/E92/E93 3 Series, pre-LCI and LCI | Yes | M Sport centre and side grilles, fog housings or blanks, brake air ducts, lower deflectors, sometimes side guide rails and undertray adapters | Pre-LCI and LCI guides differ. Rear conversions often need two support brackets, but fronts usually share primary anchors. |
F30/F31/F32/F36 3 and 4 Series | Yes | M Sport lower grille set, three-piece ducting for the larger intakes, specific fog trims, undertray link panel, PDC holders | Some M Sport fronts have three vent ducts where SE has two, so order the full duct set to avoid gaps. |
G20/G21 3 Series | Yes | Grilles and side bezels, fog or blank panels, radar bracket if fitted, arch seals, undertray pieces | Clips and screw points match. Wiring for fogs and PDC must match the bumper layout. |
F10/F11 5 Series | Yes | Centre grille, fog bezels, undertray adapter panel, sometimes a different foam absorber profile | Reports vary on the absorber. Plan to compare profiles during test fit. |
This table focuses on the front. Rear swaps follow the same logic, with diffuser panels and support rails being the main differences.
Planning the Retrofit Like a Pro
A successful swap is mostly preparation. Here is a simple playbook:
- Confirm your exact car
- Model code, body style, and year.
- Pre-LCI or LCI.
- Sensor count and positions, such as PDC and radar.
- Fog light presence, headlight washers, tow hook location.
- Study the parts diagram for your VIN
- Open the M Sport bumper diagram and list every M labelled grille, duct, bracket and undertray piece.
- Cross check which items your SE already has. Many will not match by shape.
- Decide your fog and sensor plan
- If your M Sport bumper has fogs and your SE didn’t, add wiring, switch and coding.
- If your bumper deletes fogs, your car may need coding to avoid warnings.
- Count PDC sensors and match the bumper. Sensor holes, holders and grommets differ.
- ACC radar and night vision need the correct bracket and clear aperture.
- Order genuine mounting clips, gaskets, and a BMW front bumper
- Old clips often break during removal. Add a clip kit, sensor grommets, and washer jet seals.
- Towing eye cover and washer caps must match the new bumper colour after paint.
- Paint after a dry build
- Ask the shop to test fit the primed bumper with all inserts and ducts installed.
- Adjust alignment, confirm gap symmetry, then paint.
- Metallic shades benefit from blending the wings for a perfect colour transition.
- Coding and calibration
- Fog lights, PDC and radar may need coding or calibration after refit.
- Many independent BMW specialists can handle this with factory-level tools.
Electrical and Sensor Considerations
Modern BMW bumpers are part of a network of sensors and lighting. Skipping this section creates warning lights and reduced functions.
- PDC sensors Sensor hole positions and the holders behind them are bumper specific. Transfer your sensors into the M holders with fresh grommets. Some bumpers change the angle of the sensor, so the correct holder is essential for reliable operation.
- Fog lights M Sport may relocate or remove fogs. If you add fogs for the first time, a small wiring harness is needed, the correct switch panel with a fog button, and coding to enable the function. If you delete fogs, coding can prevent fault messages.
- Adaptive cruise and radar The bracket lives behind the lower grille. The M Sport carrier keeps the radar centred at the right height. Use the correct bracket and have the system aligned afterwards.
- Headlight washers Some M Sport fronts come with washer jet cut-outs that differ from SE. Reuse your pump and lines, but order the bumper-compatible jet housings and caps. Test for leaks before paint.
- Night vision or camera modules Rare on smaller models but present on higher trims. These need the correct window and mount in the bumper mesh.
Cooling and Aero Details That Actually Matter
Those larger intakes are not just for looks. M Sport fronts often route extra air to the brakes and intercooler or radiator sides. The ducts that snap to the bumper guide the flow into place.
Without them, air tumbles into the void and stones can reach the bay. The lower undertray completes the seal between bumper and chassis, which helps keep engine temps stable and reduces lift at speed. You can reuse the main engine splash guard, but an adapter or different forward section is common.
Brake cooling ducts are worth the small extra cost. They clip to the bumper and route air to the inner wheel. On a long downhill or track evening, they earn their keep.
Genuine, Used or Replica
All three paths work, with different trade-offs.
- Genuine new Best fit and plastic quality. The part arrives in primer and is ready for paint. Pricey, but the least hassle for body shops, which can save labour.
- Genuine used Good value if the tabs are intact and the bumper isn’t warped. Check the central upper lip and side tabs for stress marks. Buy from a car with the same sensor and washer layout when possible.
- Replica Quality varies widely. Some fit fine after minor trimming; others need significant fettling around the grille or arch edges. If you go this way, budget extra time for the body shop and insist on a dry fit before paint.
DIY or Body Shop
Swapping the shell is not complicated. The concern is panel alignment, paint finish, and sensor reliability.
A skilled DIYer can remove and refit with basic tools, but painting and blending are specialist work. If you are installing radar or coding fogs, involve a BMW specialist. Many mobile coders can visit the body shop after refit.
A typical sequence at a professional shop:
- Remove the SE bumper, arch fasteners, and lower clips.
- Transfer reusable items and compare absorbers and brackets.
- Install ducts, grilles, and holders on the M Sport bumper on the bench.
- Dry fit the assembly, check gaps to wings and bonnet, adjust guides if needed.
- Remove, paint, then refit with new clips and seals.
- Reconnect sensors, fogs, and washers, pressure test and code as needed.
Time and Cost in the UK
Prices swing with model and whether you choose genuine parts.
- Bumper shell
Genuine new: £400 to £900 for many 3 Series and 5 Series cars.
Quality replica: £150 to £400.
Used OEM: £150 to £500 depending on condition and rarity. - Ancillary plastics
Grilles, ducts, fog surrounds, and brackets: £120 to £350 if buying new.
Undertray or adapters: £40 to £150. - Paint and fitting
Paint and labour: £250 to £600 for a BMW front bumper.
Blending into wings increases cost, often worth it for metallics. - Coding and calibration £50 to £200 depending on what needs enabling or aligning.
Many owners complete the upgrade for £600 to £120 with careful sourcing. Rare colours, ACC radar, and headlight washers can push the total higher.
Paint and Finish Tips
- Always test fit before paint. Minor trimming is much easier on bare primer.
- Replace any bent side guides. A straight guide keeps the arch edge tight.
- Use genuine PDC grommets. They seal better and keep the sensor face flush.
- Ask the painter to replicate the OE texture in black plastic inserts where possible.
- If you plan a splitter, drill after paint using a template and stainless fixings.
Insurance, Safety and MOT
In the UK, body kit changes, such as upgrading to a BMW M-Sport front bumper, count as a modification. Tell your insurer. Most are fine with factory M Sport parts, and the premium impact is small. If your car has radar, get it calibrated. A misaligned radar can affect cruise and collision warnings.
MOT testers check for secure bodywork, correct fog operation, and plate visibility. Keep the towing eye cover accessible and the number plate properly mounted within the legal size and spacing.
A Few Model-Specific Notes
- E9x 3 Series Pre-LCI to M style can need extra side guides. LCI cars tend to be more swap friendly. Front brake ducts and lower deflectors are common add-ons.
- F3x 3 and 4 Series The big change is the three-duct front. Order the middle and the two side ducts, then the corresponding mesh and fog surrounds. Without these, the centre looks unfinished.
- G2x 3 Series Sensor and fog combinations vary. The shell bolts up, but you must match the front harness to the bumper layout, especially if moving from halogen fogs to LED or to no fogs.
- F10 5 Series Some owners keep the base absorber, others swap to the M profile. Dry fit to see which seal line works best, then commit.
Common Pitfalls to Avoid
- Buying a bumper from a different facelift stage. The lines can be close but not the same near the headlamps. Always match LCI status.
- Forgetting the undertray interface. The front edge of the tray must seal to the bumper. If it does not, the lower lip looks saggy and airflow suffers.
- Mixing sensor holders. A sensor in the wrong holder can sit proud or angled. That triggers false alarms.
- Painting before a dry build. The first trial fit is where you adjust tabs and add or remove shims. Do that in primer, not in fresh paint.
- Overlooking washer jets. The wrong jet or cap will never sit flush. Order by bumper variant.
Quick Checklist Before You Press Buy
- Bumper shell compatible with your model, body style, and LCI status
- Centre grille insert plus left and right side grilles
- Fog light housings or blanks that match your plan
- PDC holders and grommets, correct count and positions
- Radar or camera bracket if your car has these systems
- Headlight washer jets and caps if applicable
- Brake cooling ducts and any deflector plates
- Undertray or adapter panel that matches the M Sport bumper
- New clips, screws, arch liner pins, and sealing strips
- Towing eye cover for the M Sport bumper
- Paint and blending plan agreed with your body shop
- Coding appointment for fogs and sensors if needed
The Real Answer Enthusiasts Look For
Yes, you can give an SE BMW the sharper M Sport face without hacking the car.
BMW’s shared mounting points make it possible, and owners do it every week. The key is buying the bumper as a system, not as a single skin.
When the right ducts, grilles, and brackets are in place, the lines meet the wings cleanly, the sensors work as they should, and cooling works properly.
Plan the parts list around your VIN, test fit before paint, and the result will look and function like it left the factory that way.


























Leave a Comment