


























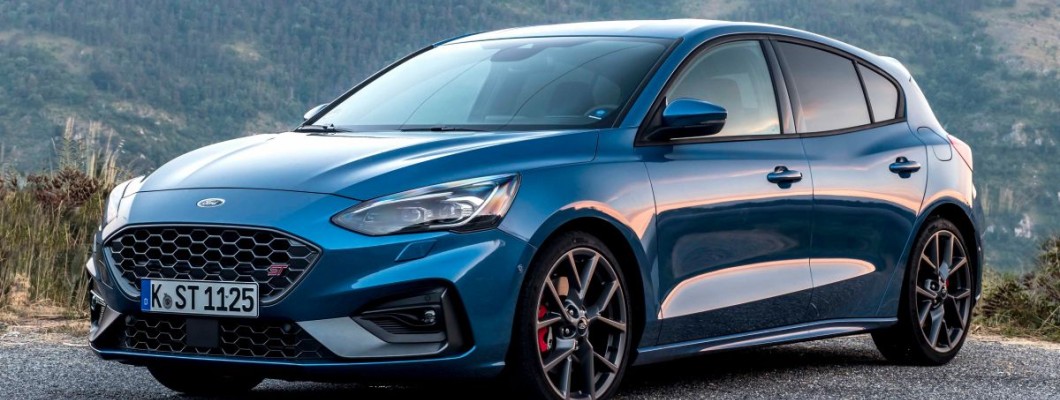
This Ford Focus Mk4 front bumper removal guide covers the 2018–2021 pre-facelift Focus Mk4/C519 and explains how to remove, replace and refit the bumper without damaging the wheel arch liner, undertray, bumper clips or electrical connections. The basic removal is manageable with ordinary hand tools; the main difficulty is matching the correct bumper family, trim pieces, parking-sensor layout and front-end equipment before refitting.
Browse genuine Ford Focus bumpers and headlights
Quick answer:
- The bumper is retained across the upper slam-panel area, inside both front wheel arches, along the undertray and by side guides beneath the headlamps.
- Allow roughly 60–90 minutes for a careful first removal and longer when transferring grilles, PDC holders, trims and washer components.
- Do not buy by colour or registration year alone. Match the full part number, pre-facelift/facelift state, trim family and equipment openings.
Vehicle-specific fitment snapshot
- Generation: Fourth-generation Ford Focus Mk4, commonly identified internally as C519 and based on Ford's C2 platform.
- Guide coverage: 2018–2021 pre-facelift front end.
- Trim families: standard/Zetec/Titanium, Vignale, ST-Line, Active and the separate ST performance model.
- 2022-on warning: facelift models use a redesigned grille, bonnet, headlamp treatment and front fascia. Do not assume those bumpers or attached parts interchange with the 2018–2021 design.
- Equipment checks: parking sensors, fog lamps or blanking sections, headlamp washers, active grille shutters and adaptive-cruise radar where fitted.
- Body style: hatchback and estate often use the same front-bumper family within the same trim and model phase, but confirm by VIN and full engineering number.
Why the basic fit and removal is usually simple
The Ford Focus Mk4 bumper removal process follows a logical front-end layout. Once the upper fixings, wheel-arch fasteners, hidden corner retainers and lower undertray fixings are released, the cover moves forward from the side guides. No cutting or drilling should be required on an undamaged, factory-assembled car.
The job becomes difficult when a previous repair has introduced non-standard screws, broken tabs, adhesive or incorrectly fitted guides. Work by fixing zone rather than relying on one fixed fastener count: inspect the full upper edge, both wheel arches and the entire lower join before pulling on the cover.
Where the differences hide
The painted bumper cover is only one part of the assembly. The lower grilles, outer finishers, lamp surrounds, sensor holders, air guides and undertray connection determine whether a replacement will fit and look correct.
- Standard, Zetec and Titanium: normally use the cleaner standard lower-grille and corner-trim arrangement.
- ST-Line: uses a sportier lower intake and matching mesh, finishers and surrounding plastics.
- Active: uses its own protective lower treatment and crossover-style finishers. Even where a base cover appears related to ST-Line, the attached trim package must be matched.
- Vignale: may use different brightwork, grille details and premium finishers.
- ST: is the performance model, not simply an ST-Line. Treat its bumper, ducting and cooling requirements as a separate specification.
For a conversion rather than a like-for-like replacement, read the separate Ford Focus ST-Line front bumper fitment guide before buying the cover.
Ford Focus Mk4 trim and model-year comparison
| Version | Typical front-end treatment | Important fitment warning |
|---|---|---|
| Standard / Zetec / Titanium | Conventional lower grille and outer corner trims | Match fog-lamp or blanking-panel design, PDC holes and washer provision. |
| ST-Line | Sportier lower intake, mesh and more aggressive finishers | The painted cover alone is not a complete conversion; matching grilles and trims are normally required. |
| Active | Crossover-style protective lower trim and distinctive inserts | Do not assume Active finishers transfer to a standard or ST-Line assembly. |
| Vignale | Trim-specific premium detailing and brightwork | Check grille, lower inserts and decorative finishers before paint. |
| ST performance model | Performance-specific fascia, openings and ducting | Treat separately from ST-Line and verify cooling-related components. |
| 2022-on facelift | Redesigned grille, bonnet, lamps and front fascia | Outside this guide; do not mix casually with the 2018–2021 pre-facelift front end. |
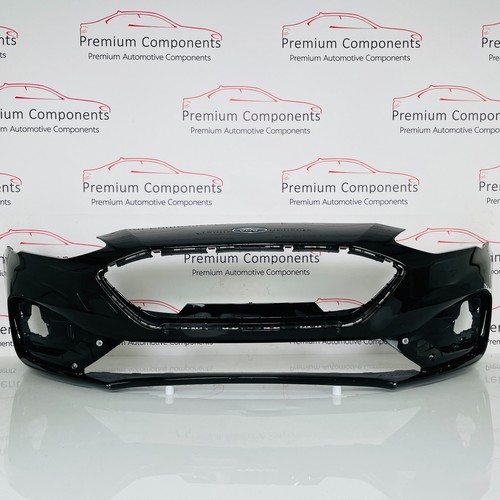
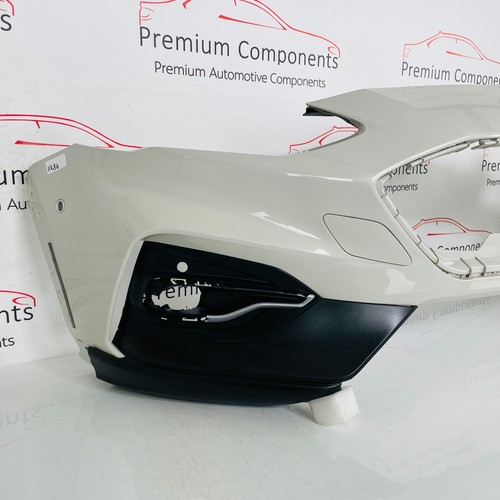
Genuine bumper examples: ST-Line and Active are not the same finished assembly
These genuine OEM bumper examples show why a visual and part-number check matters. Stock changes regularly, so use the images as fitment references rather than an indication that a particular item remains available.

Model year and part-number checks that matter
- Use the full engineering number: many pre-facelift Mk4 covers use a JX7B family number, while later facelift examples commonly use NX7B. This is only a first clue; always verify the full suffix and VIN.
- Do not rely on registration year: for any 2022-registered car, compare the bonnet, grille and headlamp shape and confirm the VIN or original part number.
- Check the equipment openings: a cover with the wrong PDC, fog-lamp or washer configuration can require extra parts and may not be suitable at all.
- Check what is included: a bare skin, a partly dressed bumper and a complete assembly are very different purchases.
- Trial-fit before paint: confirm wing, headlamp, undertray and grille alignment before paying for refinishing.
The current Ford Focus bumper and headlight range contains real photographs and equipment details that can help with visual identification.
Electronics, sensors and front-end equipment
- Parking sensors (PDC): the original sensors can usually transfer when the replacement has the correct holder type, count, height and angle. Mark each sensor position before removal.
- Fog lamps or DRL-related wiring: unplug the connectors only after the bumper has been moved forward enough to reach them without pulling the loom.
- Headlamp washers: if fitted, prepare for washer fluid loss and cap or secure the hose after disconnecting it.
- Adaptive cruise radar: do not strike, bend or casually reposition its bracket. If the radar or bracket is removed, shifted or replaced, follow Ford repair information and arrange calibration where required.
- Active grille shutters: some cars have shutter assemblies behind the grille. Inspect the wiring and moving slats rather than forcing the bumper against them.
For ordinary PDC or lamp connectors, routine battery disconnection is not automatically necessary. Switch the ignition fully off, keep the key away from the vehicle and do not turn the ignition on while front-bumper equipment is disconnected. Follow vehicle-specific Ford procedures if radar hardware or another assisted-driving component will be disturbed.
What usually transfers to a replacement bumper?
| Component | Usually reusable? | Notes |
|---|---|---|
| Parking sensors | Usually | Keep their original positions and use compatible holders with the correct angle. |
| PDC wiring loom | Usually | Inspect connector locks and every retaining clip before refit. |
| Lower grille and outer inserts | Only on the same trim family | Standard, ST-Line, Active, Vignale and ST parts should not be assumed interchangeable. |
| Fog lamps / blanking pieces | Sometimes | The housing shape, surround and mounting depth must match the new bumper. |
| Tow-eye cover | Only with matching cover | Shape and finish can differ between bumper families. |
| Side guides / retainers | Sometimes | Compare part numbers and replace guides that are cracked, distorted or loose. |
| Crash absorber foam | Usually, if undamaged | Inspect after any impact and confirm it suits the replacement bumper family. |
| Undertray front edge / air guides | Sometimes | Lower joins and ducting can be trim-specific. |
| Crash bar | Not part of a normal cover swap | It remains on the car. If damaged or distorted, obtain professional structural advice rather than simply covering it. |
Building the right parts and tools list
Tools
- T25 and T30 Torx bits
- 8 mm and 10 mm sockets, plus a small ratchet and extension
- Plastic trim-removal tool and trim-clip pliers
- Small flat screwdriver or pick for connector locks
- Ramps or a trolley jack with correctly positioned axle stands, if extra lower access is needed
- Magnetic tray or labelled containers for each fixing zone
- Masking tape and a padded blanket or bumper stand
Parts worth having ready
- Correct pre-facelift bumper cover for the car's trim and equipment
- Replacement push clips, wheel-arch fasteners and any missing lower screws
- Matching lower grille, outer inserts and lamp surrounds when changing trim
- Replacement side guides if the current bumper corners sit proud
- Compatible PDC holders or adhesive mounting rings if damaged

Step-by-step Ford Focus Mk4 front bumper removal
Step 1: Prepare the vehicle
Park on level ground, select first gear or Park, apply the handbrake and switch the ignition fully off. Move the key away from the car. Turn the steering for wheel-arch access or remove the front wheels if you prefer more working room. Apply masking tape to the wing and headlamp edges.
Step 2: Remove the upper slam-panel cover and fixings
Open the bonnet and remove the plastic upper cover where fitted. Release its push clips carefully, then remove the upper screws or bolts securing the bumper to the radiator support. Many examples use a row of four upper screws with additional clips, but trim and previous repair history can change the exact arrangement.
Step 3: Release the front wheel arch liner fixings
At each side, remove the screws and clips securing the forward section of the wheel arch liner to the bumper. Pull the liner back just far enough to see the bumper-to-wing joint and the hidden corner fixing. Do not tear the liner or force it past the tyre.
Step 4: Remove the hidden bumper-corner fasteners
Locate the upward-facing or inner corner fastener at the bumper-to-wing join and remove it on both sides. Check for any additional clip or repair screw fitted by a previous bodyshop before attempting to release the bumper corner.
Step 5: Remove the lower undertray fixings
Work across the complete lower edge and remove every screw and push clip joining the bumper to the undertray and lower air guides. Keep different-length screws separated. A single missed lower fixing is enough to crack a tab when the cover is pulled forward.
Step 6: Release the bumper from the side guides
Support one corner and pull it gently outward and slightly forward beneath the headlamp. The aim is to slide the bumper teeth out of the side guide, not bend the corner downward. Repeat on the opposite side and stop if the cover remains firmly held; a fastener is probably still fitted.
Step 7: Move the bumper forward a short distance
With a helper supporting the opposite side, move the cover forward only far enough to access the wiring and hoses behind it. Do not let the bumper hang from the PDC loom or washer hose.
Step 8: Disconnect wiring and hoses
Unplug the main bumper loom or individual connectors for PDC and lamps, depending on specification. Release connector locks rather than pulling on wires. Disconnect and cap the washer hose if fitted. Do not disturb the radar bracket unless the repair requires it.
Step 9: Remove and inspect the bumper
Lift the bumper clear and place it face-up on a padded surface. Inspect the side guides, absorber foam, undertray edge, air shutters, wiring clips and crash structure. Any structural impact damage should be assessed before the replacement cover is installed.
Step 10: Transfer parts and trial-fit the replacement
Transfer only compatible components. Keep PDC sensors in their original positions, route the loom through every factory clip and confirm that grille inserts sit fully home. Trial-fit the bumper before paint, checking the wing, headlamp, bonnet and lower undertray gaps.

How to reinstall the Ford Focus Mk4 front bumper
- Fit all compatible grilles, trims, PDC holders, sensors and loom clips to the replacement cover.
- Bring the bumper to the car with a helper and reconnect wiring and washer hoses before pushing it fully home.
- Check that no loom or hose is trapped against the crash absorber, shutter assembly or side guide.
- Engage both bumper corners into the side guides evenly. Do not fully lock one side while the other remains unsupported.
- Install the upper, wheel-arch and lower fixings loosely so the cover can still move for alignment.
- Set even gaps at the wings, headlamps and bonnet edge, then tighten the fasteners using the correct Ford specifications where available.
- Refit the wheel arch liner, undertray and upper slam-panel cover.
- Test PDC, lamps and headlamp washers. Check for warning messages before driving.
Can the Ford Focus Mk4 grille be replaced separately?
Usually, the centre and lower grille pieces are retained from the rear of the bumper by multiple tabs and sometimes additional screws. Although a few clips may be reachable from the front, removing the complete bumper is normally the safer method because it gives controlled access to the retainers and reduces the chance of marking the paint or snapping the grille.
If the grille is being replaced after an impact, inspect the surrounding bumper apertures and inner supports as well. A new grille will not sit correctly if the bumper opening is distorted or one of the rear retaining ledges has split.
Choosing the correct replacement bumper
A good replacement decision should answer all of these questions before the bumper is painted:
- Is it the 2018–2021 pre-facelift shape rather than the 2022-on facelift?
- Does the full engineering number match or supersede the original part correctly?
- Is it standard/Zetec/Titanium, ST-Line, Active, Vignale or ST?
- Does it have the correct PDC, fog-lamp and washer configuration?
- Are the side tabs, lower mounting points and grille ledges intact?
- Is the bumper supplied bare, partly dressed or complete?
Genuine used OEM covers often provide better original fit than a low-cost aftermarket skin, but condition and completeness matter. Ask for photographs of all mounting points and use the VIN, original part number and clear front-view images when requesting fitment help. Premium Components lists real images of each item in its genuine Ford bumper and headlight range.
Common pitfalls and how to avoid them
- Mixing facelift and pre-facelift parts: treat the 2022-on front end as a different family.
- Buying only the painted skin for a trim conversion: budget for matching lower grilles, outer inserts, brackets and air guides.
- Pulling before every fixing is removed: inspect all three fixing zones—upper, arches and lower edge.
- Allowing the bumper to hang from its loom: use a helper and disconnect equipment while the cover is supported.
- Mixing PDC positions: mark each sensor and keep its orientation and holder angle.
- Painting before a trial fit: confirm the gaps and attached components first.
- Reusing damaged side guides: new guides are cheaper than repeatedly pushing a loose bumper corner back into place.
Costs, time and effort in the UK
- DIY removal: approximately 60–90 minutes for a careful first attempt.
- Parts transfer, trial fit and refit: approximately 2–4 hours depending on trim and equipment.
- Used genuine bumper cover: commonly around £190–£350 depending on trim, condition and included components.
- Paintwork: approximately £250–£500 depending on colour, preparation and whether blending is required.
- Bodyshop remove/refit labour: commonly £120–£300, before paint, replacement trims or calibration work.
- Complete painted and fitted repair: often around £450–£900, with higher totals possible for ST, radar-equipped or heavily damaged cars.
DIY difficulty: moderate. The basic removal is not complicated, but matching the correct bumper and protecting the side clips, sensors and finished panel gaps requires patience.
Frequently asked questions
Can I remove a Ford Focus Mk4 front bumper myself?
Yes. A competent DIY mechanic with Torx bits, sockets and trim tools can normally remove the 2018–2021 bumper. Use a helper when moving the cover away from the car.
Does this guide cover the 2022-on Ford Focus facelift?
No. The 2022-on facelift has a redesigned bonnet, grille, headlamps and front fascia. Use vehicle-specific instructions and parts for that version.
Will an ST-Line bumper fit a Zetec or Titanium Focus?
The shell-side mounting principle may be related within the same pre-facelift generation, but a proper conversion normally requires the matching ST-Line grilles, finishers, lamp surrounds, air guides and equipment provision. Confirm every part before buying.
Is the Ford Focus ST bumper the same as ST-Line?
No. ST is the performance model and should be treated separately from the appearance-focused ST-Line trim, particularly where cooling openings and ducting are concerned.
Can I reuse my parking sensors?
Usually, yes, when the replacement bumper uses compatible holders and the same sensor layout. Keep each sensor in its original position and do not alter the mounting angle.
Can the Mk4 centre grille be changed without removing the bumper?
Some clips may be reachable, but most of the grille retainers are accessed more safely from behind. Removing the bumper generally reduces the risk of broken tabs and paint damage.
Will bumper removal cause ADAS warning lights?
Ordinary PDC or lamp disconnection should not create a lasting fault when everything is reconnected correctly. Radar-equipped cars need more care; if the sensor or bracket is disturbed, inspection and calibration may be required.
Final thoughts
A successful Ford Focus Mk4 front bumper replacement starts before the old cover comes off. Confirm the 2018–2021 pre-facelift shape, trim family, equipment openings and included components first. Then remove the upper, arch and lower fixings methodically, support the cover while disconnecting its loom, and trial-fit the replacement before paint.
Browse current Ford Focus replacement bumpers and headlights, or visit the Premium Components blog for more installation and fitment guides.
Leave a Comment