


Skoda Octavia Front Bumper Removal Guide
Whether you've had a minor fender bender, need to access components behind the bumper such as the headlights or parking sensors, or simply want to upgrade the look of your pride and joy, knowing how to remove the front bumper of your Skoda Octavia is a valuable skill. This guide will walk you through the essential steps, helping you tackle the job with confidence.
Tools You'll Need
While specific tools may vary slightly depending on your Skoda Octavia model year and trim, here's a general list of what you'll likely need:
- Socket Set: Including various metric sizes (e.g., 8mm, 10mm, 13mm)
- Torx Drivers: T20, T25, T30 bits are commonly used.
- Flathead and Phillips Screwdrivers (You never know)
- Trim Removal Tools (Plastic Pry Tools): Essential for safely detaching plastic clips and trim without damage.
- Gloves and Safety Glasses: Safety First.
- Clean Workspace: A well-lit and organized area will make the job easier.
Step-by-Step Front Bumper Removal
Always refer to your vehicle's official workshop manual for the most accurate and detailed instructions specific to your Skoda Octavia model. However, here are the general steps involved, based on common practices:
- Safety First: Disconnect the negative terminal of your car battery, especially if your vehicle has front fog lights or other electrical components connected to the bumper.
- Accessing Arch Liner Screws: You do not need to remove the wheels for this process. Simply turn the wheels to the corresponding full lock (e.g., turn full left to access the right wheel arch) to allow easy access to the fasteners.
- Remove Top Torx Bits: Start by removing the 4 Torx bits located along the top edge of the bumper, visible when you open the bonnet.
- Remove Wheel Arch Torx Bits: In each front wheel arch, you will find approximately 4 Torx bits securing the bumper to the wheel arch liner. Remove these from both sides of the vehicle.
- Remove Underside Torx Bits: Next, locate and remove approximately 6 Torx bits that are underneath the bumper, securing it to the vehicle's undercarriage.
- Removing the Main Side Torx Bits: This can be the most challenging part of the removal process. There are 2 Torx bits on either side of the bumper which connect it to the fender. They are located behind the wheel arch liner. One is fairly easy to see, but the other is generally tucked away right behind the headlight assembly. You may need a 1/4 ratchet with a Torx bit adaptor to reach this, often requiring you to work by feel. This needs to be done for both sides of the bumper.
- Release Main Clips: Once all the Torx bits have been removed, the bumper is still held on by two large clips, one on each side. Looking straight down on top of the bumper, you will see two elongated/oval shaped holes moulded into the bumper (near where the headlight bolts are). Look closer, and you'll see a plastic lug sticking outwards towards the front of the car. To release, push the bumper inwards slightly to relieve pressure on the clip, then push the plastic clip downwards and simultaneously pull the bumper outwards. Do this for both sides.
- Disconnect Electrical & Fluid Lines: All main electrical connections are typically located on the driver's side, and there should be plenty of slack in the wiring. Carefully disconnect any electrical connectors for fog lights, parking sensors, or other components. Additionally, if you have headlamp washer jets, disconnect the water supply to them at the tank. You will need a small piece of pipe with a bolt in it to temporarily stop all of the water from draining out of the tank.
- Final Removal: With all fasteners, clips, and connections free, the bumper can now be carefully lifted and moved away from the vehicle.
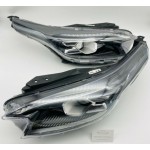
- Headlight Removal (If Required): If necessary, you can now unbolt the headlight (typically held by 3 Torx bits) and remove it.
Final Tip
After installing the new Octavia bumper, reconnect all electrical components and the battery. Test all lights, sensors, and other functionalities before driving.
This guide provides a comprehensive overview. For model-specific details, consider consulting specialized resources:
- Skoda Octavia Bumper Replacement Manuals: Change SKODA OCTAVIA Bumper yourself – manuals and video tutorials
- Skoda Octavia VRS MK3 Headlight & Bumper Removal - How To Guide: Skoda Octavia VRS MK3 Headlight & Bumper Removal - How To Guide - YouTube
Disclaimer
This guide provides general information and steps for removing a Skoda Octavia front bumper. It is intended for informational purposes only and should not be considered a substitute for professional advice or an official workshop manual. Automotive repairs can be complex and potentially dangerous. If you are not confident in your abilities or lack the proper tools and safety equipment, we strongly recommend consulting a qualified mechanic or referring to your vehicle's manufacturer-specific service manual. Premium Components Ltd is not responsible for any damage, injury, or loss incurred as a result of following the information presented in this guide. Proceed at your own risk.
Leave a Comment