


























By Premium Components Editorial Team | Published | Updated
This VW Touran front bumper removal guide covers the 2015–2020 Touran 5T/5T1 and explains how to remove, replace and refit the front bumper without damaging the grille, wheel arch liner, undertray, bumper clips or electrical connections. The basic removal is methodical; the more important job is matching the correct standard, Highline or R-Line bumper and its PDC, washer, fog-light and radar specification.
Browse VW Touran bumpers and headlights
Important: within the 2015–2020 period there is no major front-end facelift split to identify. The main fitment differences are the standard/Highline-style bumper versus R-Line, plus the exact parking-sensor, washer, fog-light and driver-assistance equipment fitted to the vehicle.
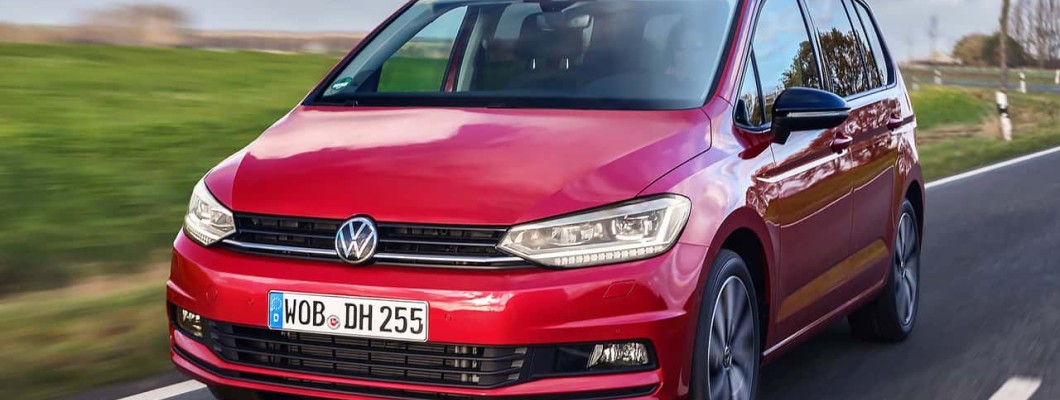
VW Touran standard vs R-Line: front-end comparison
The 2015–2020 Touran keeps the same basic 5T body family, but the finished front bumper assembly changes significantly between standard/Highline-style cars and R-Line models. The painted cover, lower grilles, chrome or black finishers, fog-light surrounds and supporting plastics must be treated as a matched system.
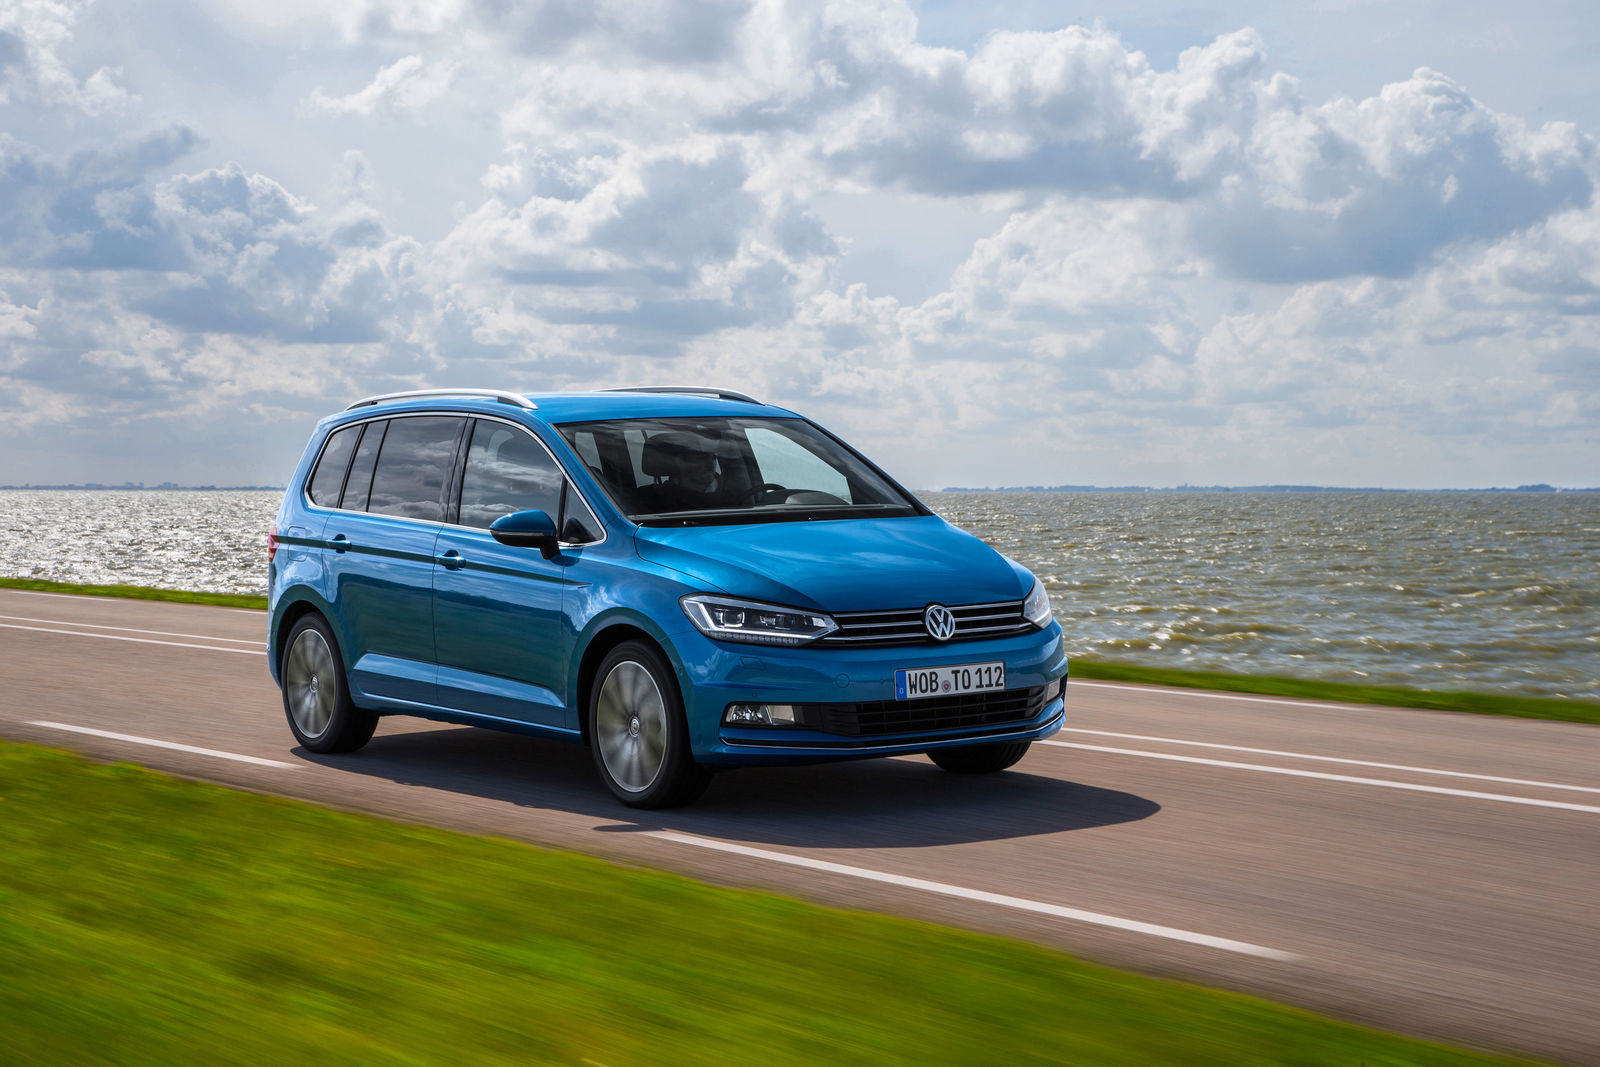
Image source: Volkswagen Newsroom.
_front.jpg)
Image: Tokumeigakarinoaoshima, CC BY-SA 4.0, via Wikimedia Commons.
Fitment warning: the two versions share the same vehicle generation, but that does not make their grilles, lower inserts, fog-light surrounds or trim brackets interchangeable. A proper R-Line conversion normally needs more than the painted bumper skin.
Vehicle-specific fitment snapshot
- Generation and model code: Touran 5T/5T1, introduced in 2015 on Volkswagen's MQB platform. Parts sellers may call it Mk2 or Mk3, so the 5T code is the safer identifier.
- Guide coverage: 2015–2020 vehicles with the original 5T front-end design.
- UK trims: S, SE, SE Family, SEL and R-Line were used across the period. Highline and Comfortline descriptions also appear on imported vehicles and parts listings.
- Trim caveat: standard/Highline and R-Line bumpers use different lower styling components even where the shell-side mounting principle is related.
- Sensor and washer caveat: confirm four- or six-sensor PDC/Park Assist provision, headlamp-washer apertures, fog-light openings and the central Front Assist/ACC arrangement.
- Body-style caveat: five- and seven-seat Tourans share the same basic body shell; seating configuration does not confirm bumper fitment. Use the VIN and full OEM number.
Why the basic fit and removal is usually simple
The VW Touran bumper removal process follows a clear sequence. The upper grille is released first, then the wheel-arch and lower undertray fixings are removed before the bumper corners slide out of their side retainers.
On many Touran 5T vehicles, two upper screws secure the radiator grille, with additional retaining tabs accessed through openings in the front panel. The lower bumper is then held by a row of undertray screws, wheel-arch screws and one upward-facing corner fixing on each side.
The process becomes difficult when a previous repair has introduced oversized screws, broken guides, adhesive or missing clips. Never pull harder simply because the bumper will not move; recheck the grille, wheel arches and complete lower edge first.
Where the differences hide
When comparing genuine VW bumpers and headlights, inspect the complete Touran assembly rather than judging compatibility from the painted face alone.
- Standard versus R-Line: the R-Line bumper uses its own lower grilles, blades, surrounds and decorative finishers.
- Highline terminology: Highline is common in European and parts listings, while UK cars more often use SE, SEL or R-Line naming. Match the part rather than relying on the trim word alone.
- PDC and Park Assist: some bumpers have four sensor holes while Park Assist-equipped cars can use six. The holder position and angle matter as much as the number of holes.
- Headlamp washers: washer-equipped covers need the correct apertures, internal brackets, jets and caps.
- Fog-light surrounds: the lamp, surround and lower grille must belong to the same bumper family.
- ACC / Front Assist: the radar or emblem-area hardware and its bracket must not be obstructed or repositioned casually.
- Undertray and air guides: lower plastics can vary with trim, engine and cooling specification even when the main cover looks similar.
Model year and trim checks that matter
- Use the 5T/5T1 code: this avoids confusion with the earlier 1T Touran sold up to 2015 and with inconsistent Mk2/Mk3 naming in parts adverts.
- Do not buy by year alone: a 2015 registration can belong to the older 1T or the newer 5T, so compare the headlamps, grille and original part label.
- Check the complete 5TA number: 5TA is common on this generation, but the full number and suffix are decisive.
- Standard and R-Line examples: Premium Components stock has included 5TA 807 221 AL on standard/Highline-style bumpers and 5TA 807 221 M on R-Line stock. These examples do not replace a VIN and specification check.
- Count every opening: compare PDC, Park Assist, washer, fog-light, tow-eye and trim apertures before paint.
- Check what is included: a bare cover can still require expensive grilles, chrome strips, brackets, sensor holders and washer parts.
- Trial-fit before refinishing: confirm wing, headlamp, grille and undertray alignment while returns or corrective work are still practical.
For a related Volkswagen removal guide covering several generations and facelift states, see the Volkswagen Tiguan front bumper removal guide.
Electronics and lighting considerations
- Parking sensors: mark each PDC sensor before removal and retain its original position and orientation.
- Park Assist: six-sensor bumpers need the correct outer sensor holders and loom routing; drilling extra holes by eye is not a factory-equivalent solution.
- Fog lights: disconnect the plugs after the bumper has moved forward enough to reach the connector locks without pulling the wires.
- Headlamp washers: clamp or plug the hose when disconnected and prepare for washer-fluid loss.
- ACC and Front Assist: avoid impact to the radar or its bracket. If the sensor, bracket or front structure is moved, professional calibration may be required.
- LED headlamps: protect the lower lamp edges while releasing the bumper corners; do not use the lamp housing as a levering point.
- Outside-temperature sensor and loom clips: inspect behind the lower grille before carrying the bumper away.
Switch the ignition fully off, keep the key away from the vehicle and do not switch the ignition on while bumper-mounted equipment is disconnected. Routine removal of ordinary PDC or fog-light plugs does not automatically require battery disconnection, but vehicle-specific Volkswagen workshop information should be followed where radar equipment or collision damage is involved.
What usually transfers
| Component | Reusable | Notes |
|---|---|---|
| Parking sensors | Usually | Keep each sensor in its original position and use compatible angled holders. |
| PDC / Park Assist loom | Usually | The replacement must support the same sensor count and clip routing. |
| Radiator grille | Sometimes | Match standard/Highline or R-Line styling and the emblem/radar arrangement. |
| Lower grilles and fog-light surrounds | Only within the same bumper family | R-Line and standard assemblies use different shapes and mounting tabs. |
| Headlamp washer jets and caps | Usually | The cover needs the correct cut-outs and internal supports. |
| Tow-eye cover | Only with a matching bumper | Shape and trim finish can vary. |
| Side guides / retainers | Sometimes | Replace any guide that is cracked, distorted or loose at the wing. |
| Impact absorber foam | If undamaged | Do not reuse crushed, split or permanently deformed foam. |
| Undertray and air guides | Sometimes | Check the lower join, trim family and engine cooling arrangement. |
| ACC radar and bracket | Normally stays with the vehicle | Do not transfer or reposition it casually; calibration may be necessary if disturbed. |
Building the right parts and tools list
Parts and consumables
- Correct Touran 5T front bumper, confirmed using the VIN and complete OEM number
- Matching standard/Highline or R-Line centre grille, lower grilles and decorative finishers
- Compatible fog-light surrounds, lamps or blanking sections
- Spare bumper clips, wheel-arch screws, push rivets and lower undertray fixings
- Replacement PDC holders, side guides, washer caps or tow-eye cover where required
- Masking tape for the wing and headlamp edges
- A washer-hose plug or clamp and a clean padded surface for the removed bumper
Tools
- T25 and T30 Torx drivers or bits
- Small socket set, commonly including 8 mm and 10 mm sizes
- 1/4-inch ratchet with short extension
- Plastic trim tools and trim-clip pliers
- Long flat-blade screwdriver for releasing the upper grille tabs through the access holes
- Small pick or terminal tool for connector locks
- Jack and axle stands or ramps if safe lower access is required
- Labelled containers for separating grille, wheel-arch and undertray fasteners
Step-by-step: how to remove a VW Touran front bumper
Step 1 — Confirm the vehicle and replacement bumper
Make sure the vehicle is the Touran 5T/5T1 rather than the earlier 1T. Record the original bumper label, complete 5TA part number, trim family, PDC count, washer caps, fog-light surrounds and grille design.
Compare the rear of the replacement with the original. Check every sensor holder, grille ledge, mounting tab, lower air guide and tow-eye opening before the car is dismantled.
Step 2 — Prepare and protect the car
Park on level ground, select Park or first gear, apply the parking brake and switch off the ignition. Keep the key away from the vehicle.
Turn the steering for access to one wheel arch at a time, or remove the front wheels if the Touran is safely supported at the approved lifting points. Protect the wing and headlamp edges with masking tape.
Step 3 — Release the upper radiator grille
Open the bonnet and remove the upper screws securing the radiator grille. On many Touran 5T cars there are two top screws, followed by retaining tabs that can be released through access holes in the front panel using a long flat screwdriver.
Pull the upper part of the grille forward evenly while releasing the tabs. Do not twist one side sharply, because the grille frame and clips can crack.
Step 4 — Remove the lower undertray fixings
Work across the full lower edge and remove the screws joining the bumper to the undertray, spoiler and air guides. Depending on specification and prior repair history, there may be approximately nine to eleven lower fixings.
Keep different-length screws separated and confirm that the entire lower edge moves independently before the bumper is pulled forward.
Step 5 — Free the wheel arch liners
Remove the screws securing the front of each wheel arch liner to the bumper. Many 5T examples use three screws per side in this area, but inspect the full edge for extra repair fixings.
Pull the liner back carefully to expose the upward-facing bumper-corner screw and the side guide beneath the headlamp.
Step 6 — Remove the hidden corner fixings
Remove the upward-facing screw securing the bumper corner to the wing-side guide on each side. Check that no non-standard screw, cable tie or adhesive has been added during an earlier repair.
Step 7 — Release the bumper corners
Support one corner and pull it gently outward from the wing, then slightly forward. The bumper tabs need to slide out of the retainer rather than being bent downward.
Repeat on the opposite side. If either corner remains solid, stop and recheck the hidden screw and wheel-arch liner before applying more force.
Step 8 — Move the bumper forward and disconnect equipment
With a second person supporting the opposite side, move the bumper forward only far enough to reach behind it. Do not let the cover hang from its loom or washer hose.
Depending on specification, disconnect:
- The PDC or Park Assist wiring loom
- Fog-light connectors
- The headlamp-washer hose
- The outside-temperature sensor or smaller ancillary connectors
- Any loom clips still joining the bumper to the front panel
Release each connector by its locking tab and plug the washer hose promptly to reduce fluid loss.
Step 9 — Remove the bumper and inspect the mounting system
Carry the bumper to a padded surface. Inspect the side guides, absorber foam, undertray edge, radar bracket, fog-light brackets and wiring loom before fitting the replacement.
Transfer sensors one position at a time, copy the original loom route and trial-fit the assembled replacement before paint.
Reinstallation instructions
- Confirm that the correct grille, lower inserts, fog-light surrounds, sensors, washer pieces and loom clips are fitted securely.
- Bring the bumper to the vehicle with a helper and reconnect every plug and hose while the cover remains supported.
- Check that no loom, hose or air guide is trapped against the absorber, radiator support or side guides.
- Offer the bumper into the centre position and engage both corners evenly into the wing-side retainers.
- Install the upper, wheel-arch and lower fasteners loosely so the cover can still move for alignment.
- Set even gaps at the headlamps, wings, bonnet and grille before tightening the fixings.
- Refit the radiator grille, wheel arch liners, undertray and upper screws.
- Test PDC/Park Assist, fog lights and headlamp washers, and check for driver-assistance warnings before road use.
- Arrange diagnostic checks or calibration if the radar, its bracket or collision-damaged front structure was moved.
Common pitfalls and how to avoid them
- Confusing 1T and 5T cars: a 2015 registration can sit on either generation, so use the VIN and visual front-end design.
- Confusing Mk2 and Mk3 seller labels: use Touran 5T/5T1 and the complete 5TA part number instead.
- Assuming R-Line is only cosmetic trim: the bumper's grilles, blades, surrounds and brackets form a separate assembly.
- Buying a four-sensor bumper for a six-sensor Park Assist car: match the full PDC layout and holder angles.
- Missing the upward-facing arch screw: pulling the corner while secured can break the bumper tab or guide.
- Painting before trial fit: confirm all gaps and lower plastics before paying for refinishing.
- Letting the bumper hang from wiring: use a helper and disconnect the loom while the cover is supported.
- Ignoring radar alignment: a bumper that looks straight does not prove that a disturbed ACC/Front Assist sensor remains calibrated.
For related repair and fitment information, browse more installation guides before ordering paint or beginning a trim conversion.
Costs, time and effort in the UK
- Bumper removal only: approximately 60–90 minutes for a careful first attempt.
- Parts transfer, trial fit and refit: approximately 2–4 hours depending on PDC, washers and trim.
- Used genuine standard/Highline bumper cover: commonly around £180–£350 depending on condition and included parts.
- Used genuine R-Line bumper or fuller assembly: commonly around £250–£650 or more when grilles, finishers and sensor parts are included.
- Paint preparation and refinishing: approximately £250–£500 depending on colour, damage and local labour rates.
- Bodyshop removal and refitting: commonly around £120–£300 before paint, replacement trim or diagnostics.
- ADAS radar calibration: allow approximately £150–£300 or more if the radar or bracket has been disturbed.
DIY difficulty: moderate. The physical removal is straightforward for a competent DIY mechanic, but correctly identifying the bumper, grille package and sensor configuration is the more important part of the job.
These figures are practical UK estimates rather than fixed quotations. Used-part completeness, paint condition and workshop labour rates can change the final total considerably.
Frequently asked questions
Does this guide cover every 2015 VW Touran?
No. The 2015 registration year can include the older 1T and newer 5T generations. This guide covers the Touran 5T/5T1 introduced in 2015.
Is the 2015–2020 Touran described as Mk2 or Mk3?
Both descriptions appear in adverts and parts listings. The safest identifier is Touran 5T/5T1, together with the VIN and complete 5TA part number.
Was there a front-end facelift between 2015 and 2020?
There was no major bumper-and-headlamp facelift split within this period. The important differences are trim, equipment and part-number suffixes rather than a pre-facelift versus facelift body change.
Will an R-Line bumper fit a standard Touran?
The shell-side mounting concept is related, but a proper conversion normally needs the matching R-Line grilles, blades, fog-light surrounds, brackets and lower plastics. Do not budget for the painted cover alone.
Can I reuse the parking sensors?
Usually, provided the replacement has the same four- or six-sensor layout and compatible holders. Keep each sensor in its original position and orientation.
Do five-seat and seven-seat Tourans use different front bumpers?
The seating layout does not by itself determine the front bumper. Trim, equipment, model code and complete part number are the relevant checks.
Can the radiator grille be removed separately?
Yes. On many Touran 5T cars the upper grille is released first using its top screws and retaining tabs. This also provides access needed for the bumper-removal sequence.
Does ACC radar need calibration after bumper removal?
Not simply because the painted cover was removed. Calibration may be required if the radar, bracket or surrounding front structure was moved, replaced or affected by impact damage.
Final thoughts
A successful VW Touran front bumper replacement starts with identifying the car as a 5T/5T1, then matching the standard/Highline or R-Line bumper family, full 5TA part number, PDC count, washer provision and grille package.
Once the correct assembly is ready, the removal itself is methodical: release the upper grille, remove the lower and wheel-arch fixings, free the side guides, support the bumper and disconnect its wiring and hoses.
For current VW Touran bumper and headlight stock, compare the listing photographs, sensor layout, included trims and visible part-number label before ordering.
Leave a Comment